How to use Mask Layer

If you've ever tried to make an all-over print product — a Hawaiian shirt, a pair of printed socks, you've probably hit the same wall: how do you get your design to fit inside the shape of the garment?
The answer is Mask Layer.
How does it work?
Think of the garment shape as a window. Your design only shows up inside that window — anything outside gets hidden automatically. The result looks like the pattern is printed directly onto the fabric, not just slapped on top as a flat image.
Step-by-step
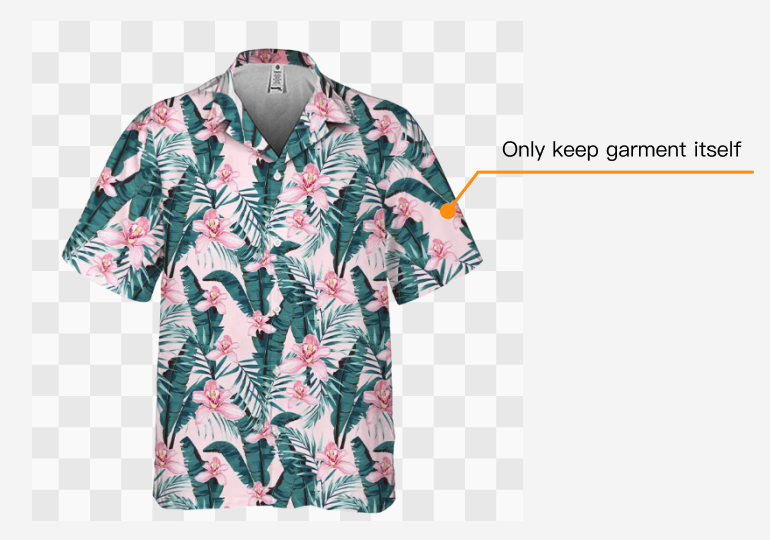
Step 1: Prepare your base image
• Format must be PNG with a transparent background
• Only keep the garment itself — remove everything else
• Areas outside the garment must be fully transparent, no white edges or leftover color
If the background isn't clean, the mask will bleed at the edges. Run it through Remove.bg or Photoshop first before uploading.
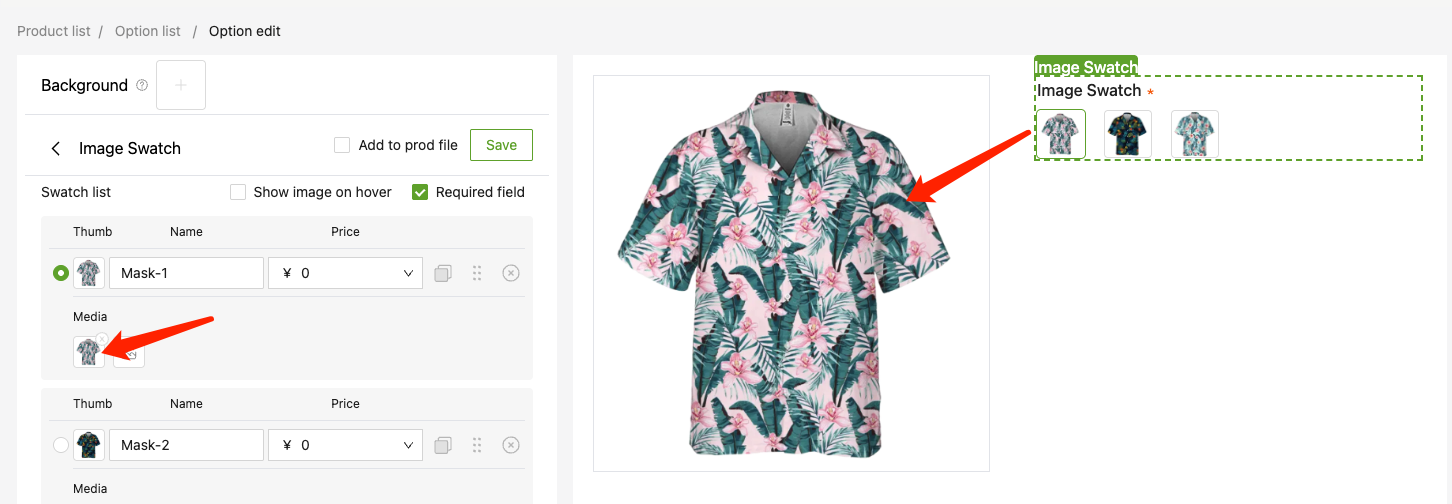
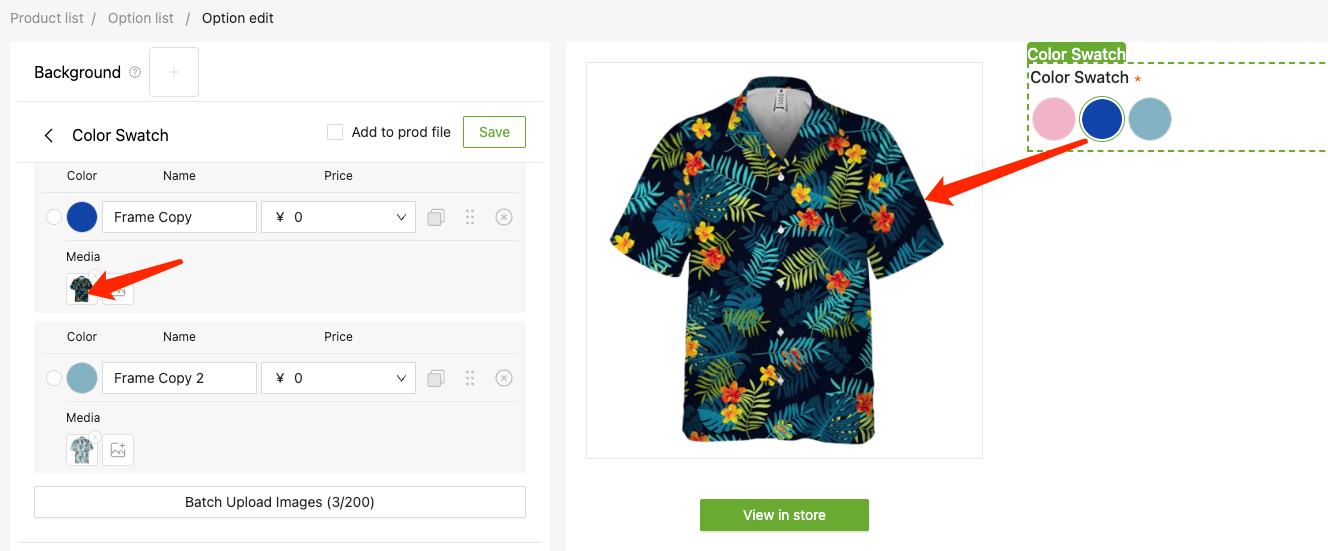
Step 2: Create a Swatch
In the editor, create an Image Swatch or Color Swatch, then upload your prepared PNG into it.
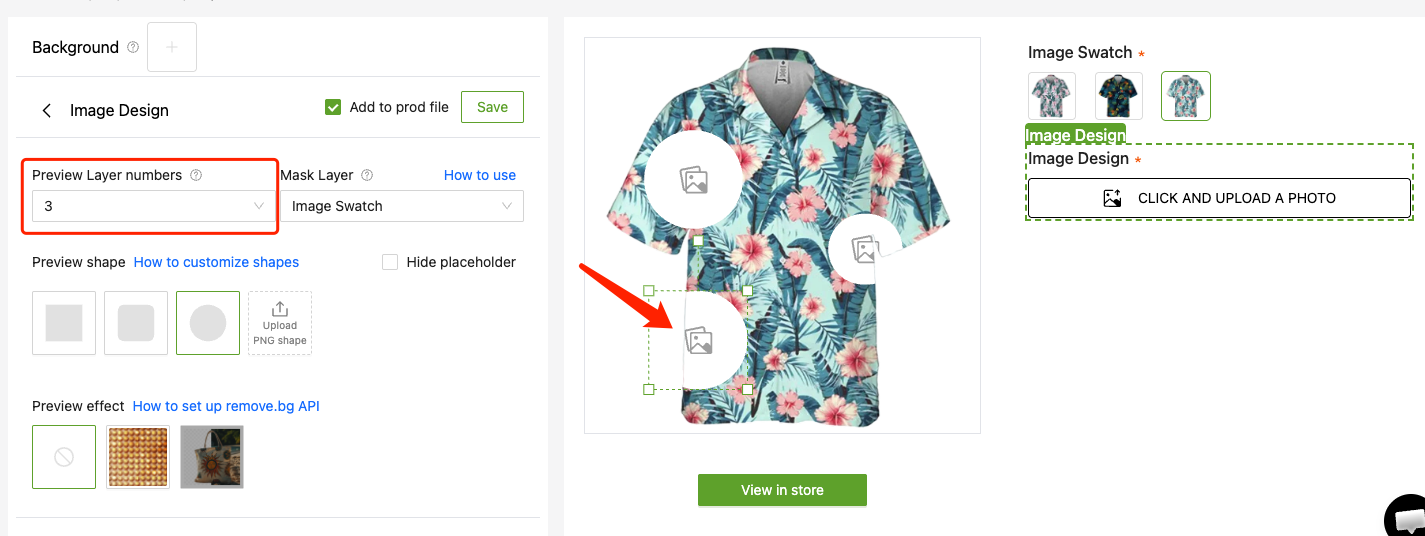
Step 3: Set up the Mask Layer
In the Mask Layer settings, select the Swatch you just created. The system will automatically process your garment image into a mask template.
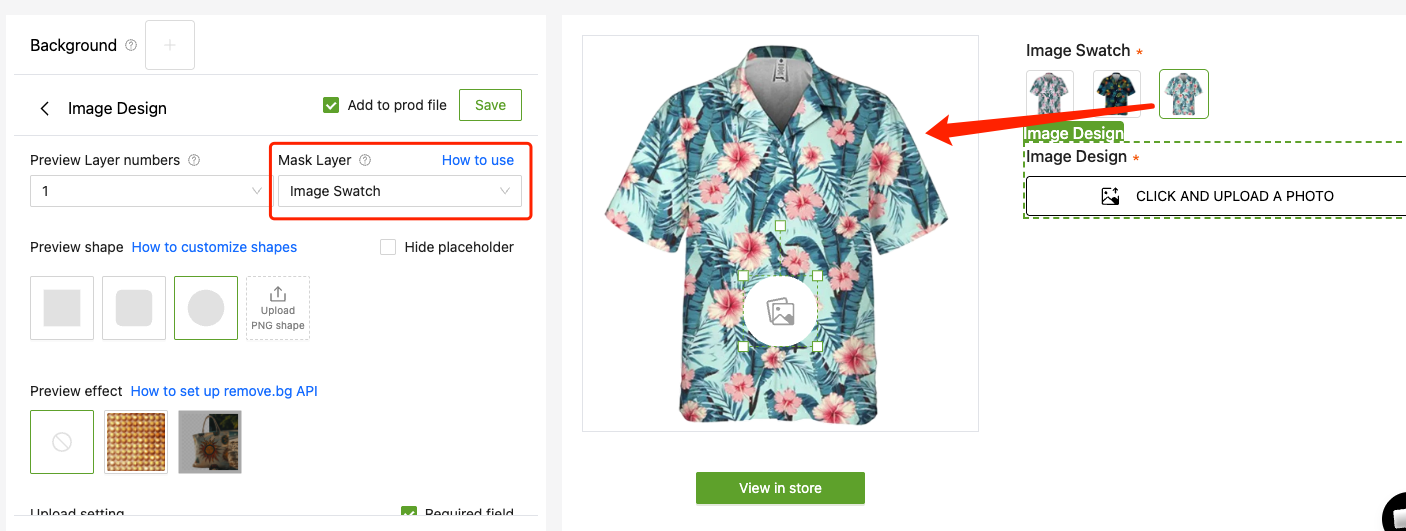
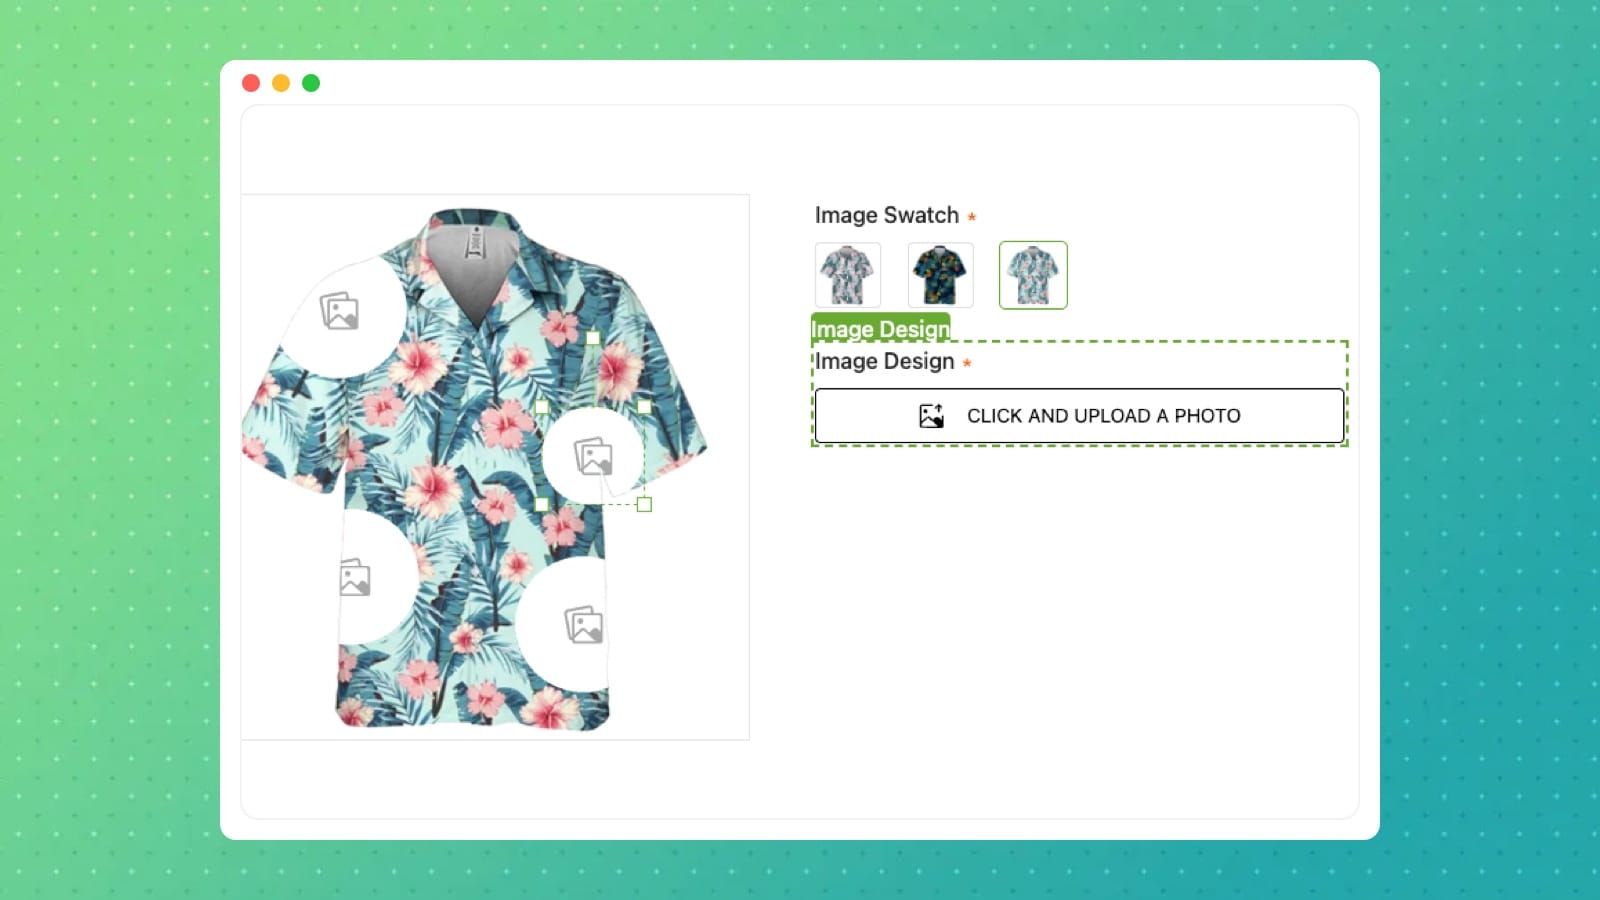
Step 4: Add your Image Design
Drop your pattern or design on top. The system will clip it to the garment outline, and the two layers merge — your all-over print is ready.