How to use SKU binding?

What is SKU Binding?
SKU binding is a method used to manage and display different pricing options for the same product.
For example, a pendant necklace can display different prices based on the number of pendants:
- 1 pendant: SKU-1, $10,
- 2 pendants: SKU-2, $14
- 3 pendants: SKU-3, $16
By using SKU binding, you can add an option called "SKU Bind" in the product settings to achieve multiple pricing displays.
How to Set Up SKU Binding?
1. Adding Multiple SKU Products in POD
If you add a POD (Print on Demand) product with multiple SKU options in Shopify, you will see the "SKU Bind" option in the product settings. This function mainly allows you to set multiple different prices for the same product.
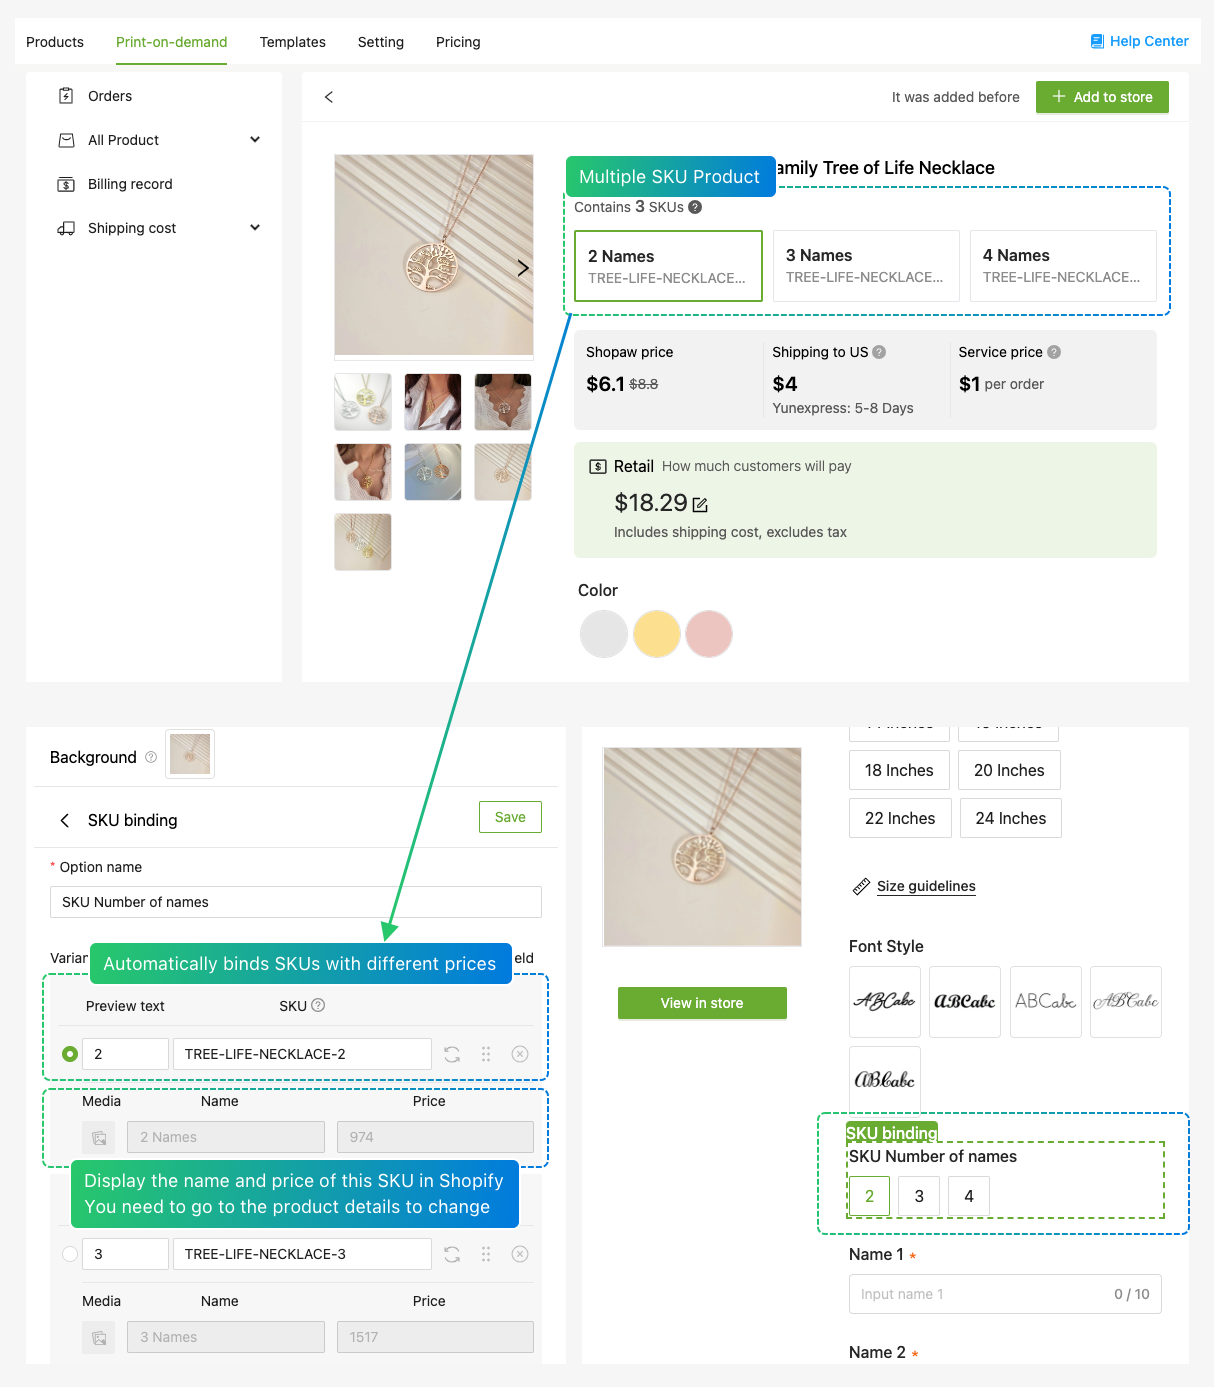
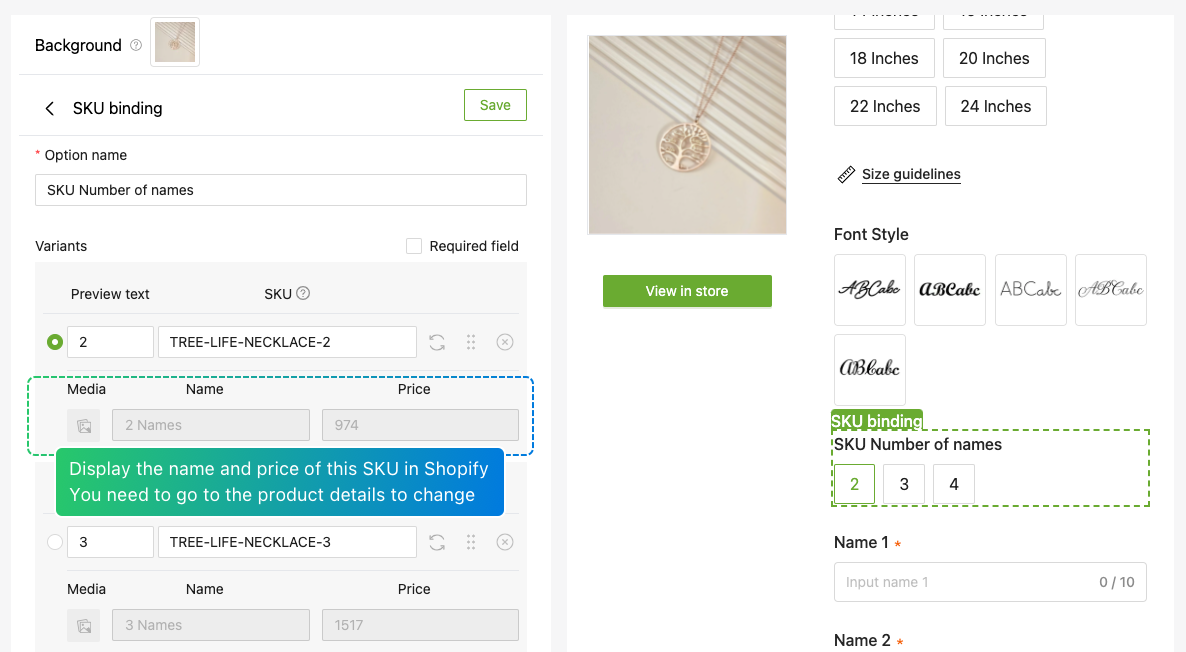
If you want to modify prices, you only need to change the prices in the product settings. Do not modify the SKU information, as this will lead to recognition issues.
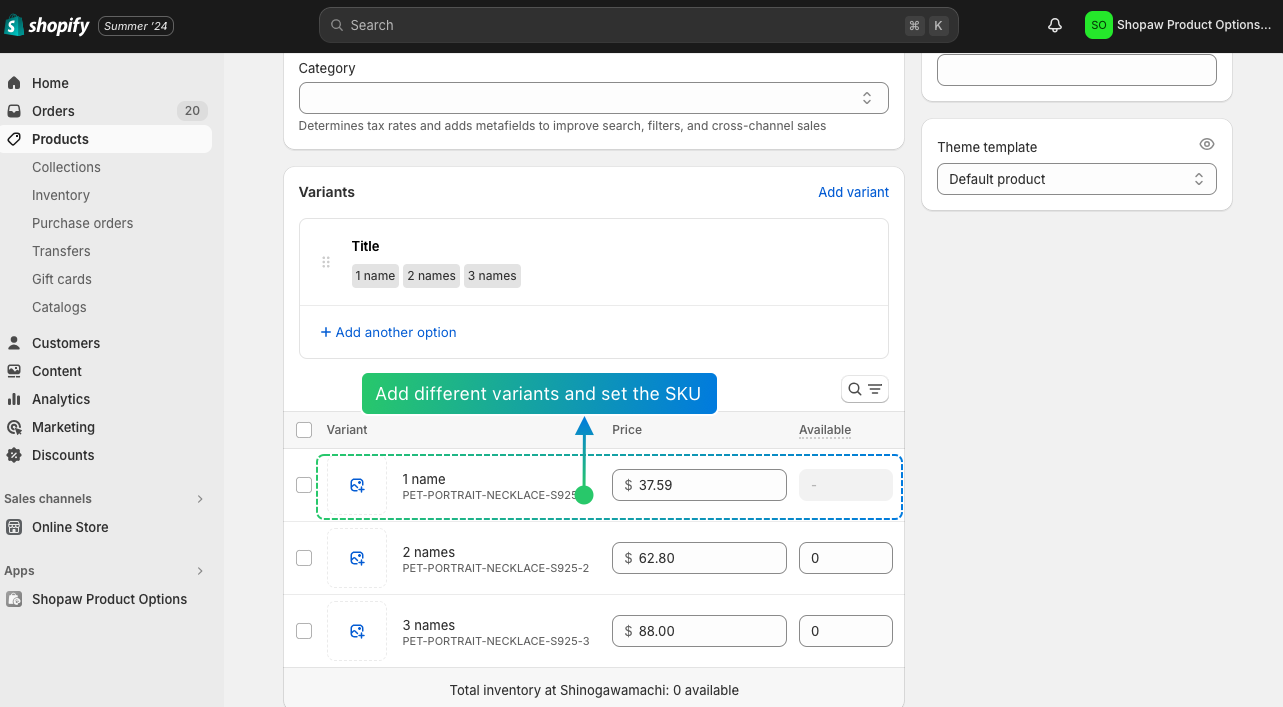
2. Binding SKUs to a Product
If you need to bind SKUs to a product, follow these steps:
- Add Product Variants: In the product settings, add different variants and set the SKU information for each variant.
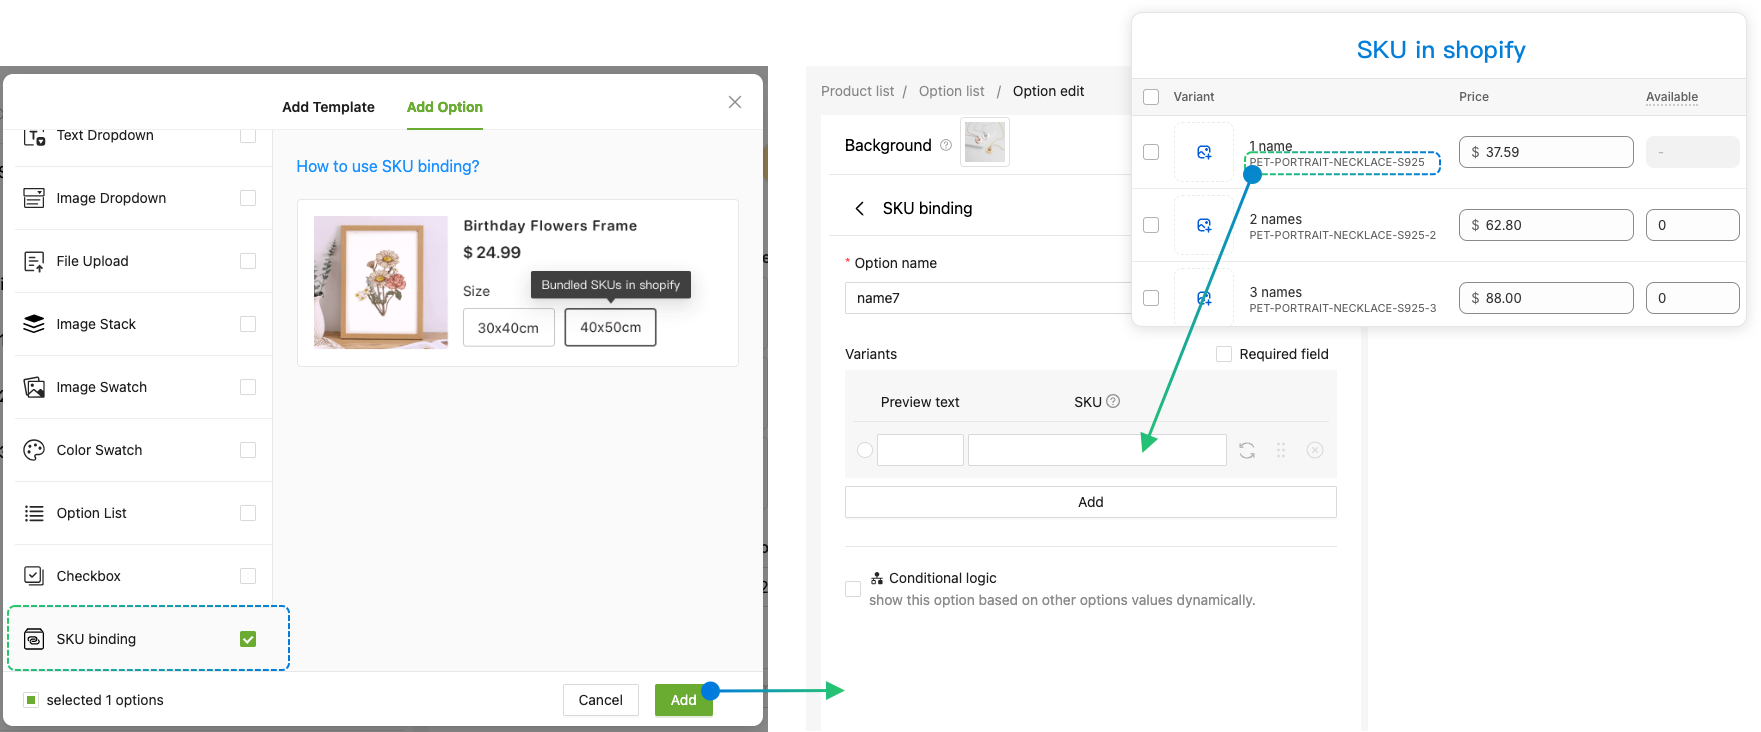
- Set SKU Options: Add a new SKU option in the variant options and input the corresponding SKU. This will achieve the SKU binding. The app automatically syncs the information you set in Shopify using the SKU.
⚠️ Precautions
- Do Not Modify POD products SKU in Shopify admin: Changing the SKU information will lead to recognition issues and affect the correct display of product prices.
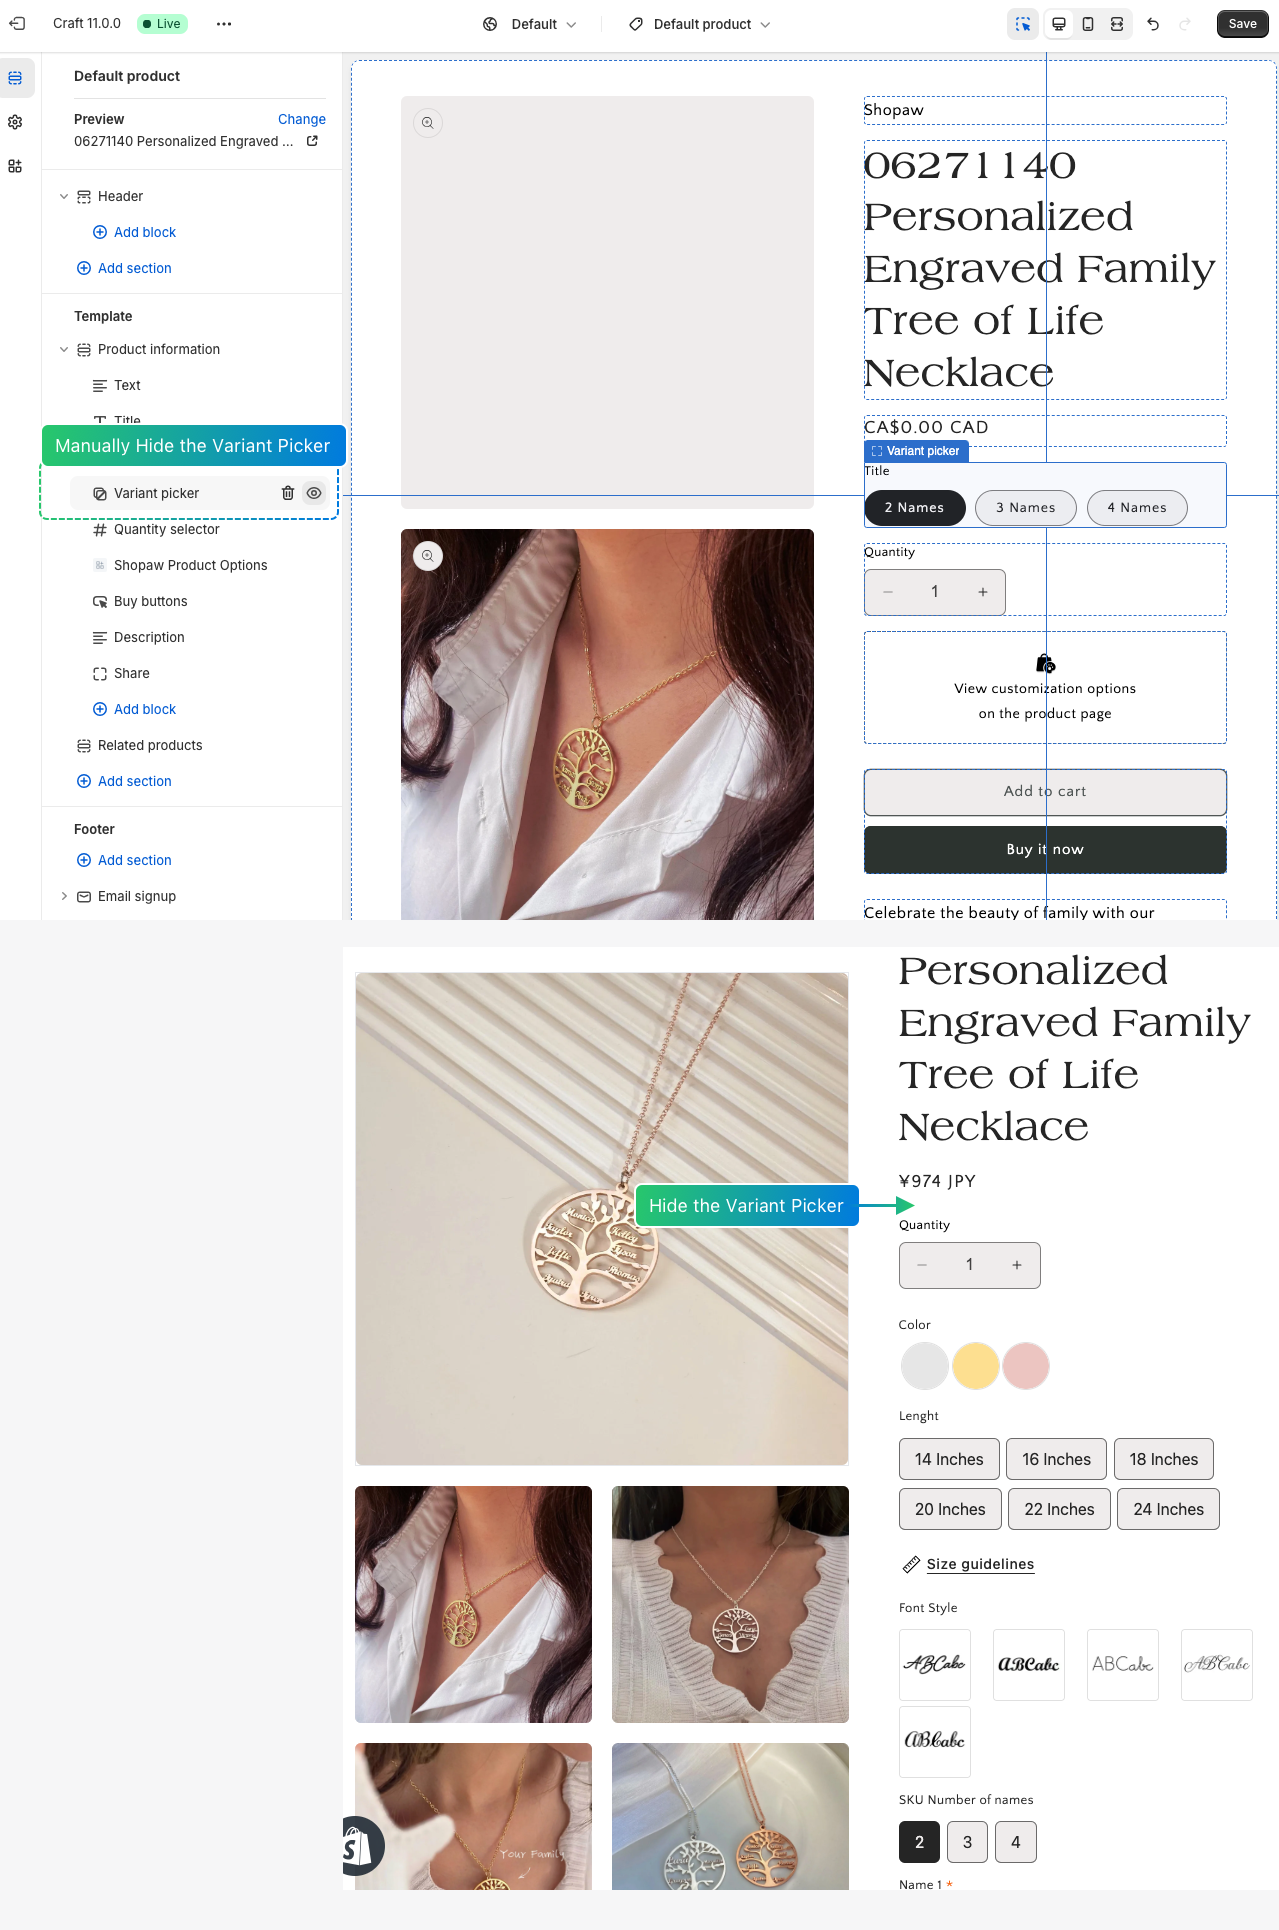
- Manually Hide the Variant Picker: Ensure to hide the [variant picker] in the template to avoid displaying multiple SKU information on the frontend.
By following the steps above, you can easily implement SKU binding in Shopify and manage multiple pricing options for your products. This not only helps optimize product display but also enhances user experience.